Since practicing the ChiRunning technique involves training your body to move differently than it is accustomed to, it can sometimes be challenging to know if you’re implementing the technique correctly. To help guide you, over the next few posts I will share ways that you can self check your own technique.
In ChiRunning, we cooperate with the two major forces that are working against you when you run, gravity and the force of the road coming at you, as you come at it. To cooperate with gravity, we maintain a tall posture, and forward fall. To cooperate with the force of the road, we land close to underneath our hips, with a bent knee, rather than out in front of the body, and land mid foot (between the ball and the arch). In order to land close to underneath your hips, and mid foot, you must shorten your stride, and keep the lower leg relaxed with the toes dropped. In conventional running, most runners land out in front of the body, with a straight leg, and the foot dorsiflexed (toes coming up towards the shin). Landing like this causes you to heel strike, is high impact, and can cause injury wherever you’re weakest, ankle, knee, hip, or lower back.
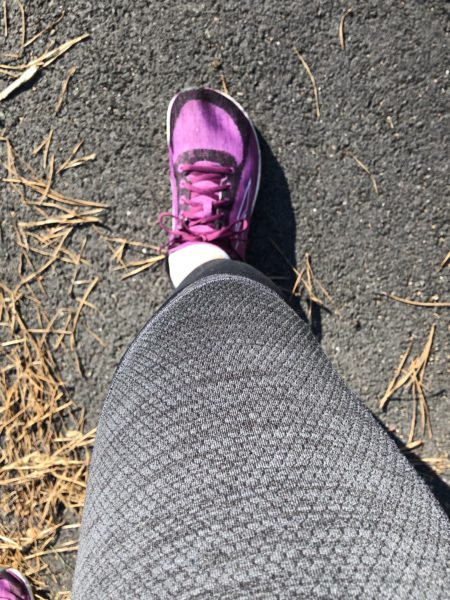
Self Check – If you’re running with proper ChiRunning technique, when you look down, you should not be able to see your shins.
Image 1 – Incorrect Form: Conventional running form, heel striking in front of the body, with leg straight, and the foot flexed upwards. You can fully see the shin and the foot flexed.
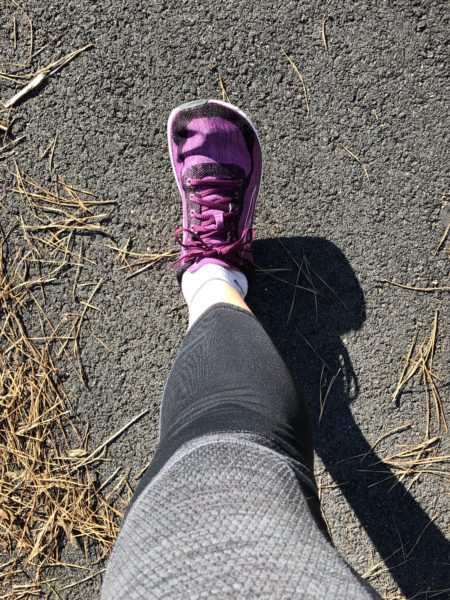
Image 2 – Correct Form: ChiRunning form, landing mid foot (ball to arch) close to underneath the hips, with a slightly bent knee. Ankle and foot are relaxed and not flexed upward (toes not poking through the top of the sneaker). You can only see the knee and the foot, you cannot see the shin.
Email me with any questions, and stay tuned for more ChiRunning self check tips!